

Gypsum cardboard is one of the most universal modern materials, it is often used for repair and construction. GCL (drywall sheets) will hide any bumps of walls, ceiling. They are more economical than other types of similar materials. Hypsum cardboard installation is usually carried out on metal profiles. Special technology will help you mount the sheets on your own. More interesting things on Фугу Казино.
Basically, walls or ceiling are sheathed with drywall. If you use drywall for wall cladding, then the PS profiles are used – rack, and Mon – guides. For the ceiling, a metal profile of PP is used – ceiling.
Hypsum cardboard installation technology:
1. Marking should be made by which you will install a metal profile next. Vertical marking lines for PS (rack profiles) should be applied along the width of the drywall sheets, but so that the joints of the sheets pass strictly along the central line of the profile. And the horizontal lines for PN are drawn by jamming the thickness of the profile and sheet of drywall. After that, a line on the floor is marked with the resulting distance using the plumb line. Exactly the same distance is measured on the ceiling.
2. Before installing metal profiles, surfaces that will be facing the wall should be pasted over with a ribbon with a rubber.
3. The installation of the guide profile should start with the floor. In terms of level, it is worth strictly attached a profile to the wall along the intended line along the floor. Using a reservoir of solid-melted material should be drilled under the dowel of the openings, retreating 6-10 centimeters from each other. Then insert the dowels themselves and fix with screws the profile. The same operation should be carried out for the guide profile on the ceiling.
4. Before installing rack profiles, you should fix straight suspensions with a rubber lining. Direct profiles must be strengthened according to pre -marked lines vertically using screws and dowels.
5. You can start installing rack suspensions. Fix them on the wall using dowels and screws. You can use self -tapping screws when attaching rack vertical profiles to guide horizontal profiles.
6. If there is a desire, then you can insulate the resulting space between profiles by any type of insulation (mineral wool, foam, etc.).
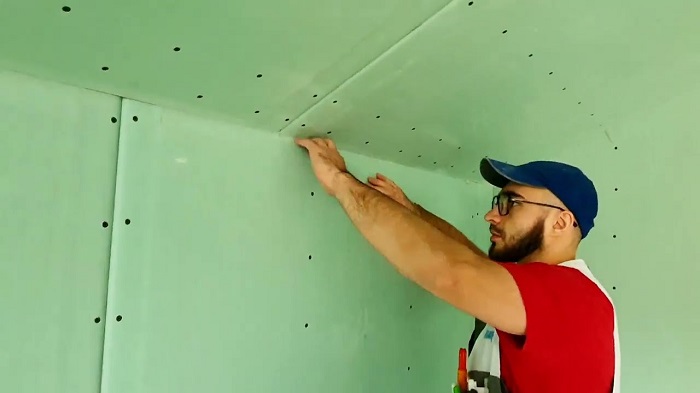
7. After the installation of the profile is completed, you can start assembling drywall sheets. Before installing sheets, it is desirable to remove a small chamfer at an angle of 40-45 degrees at vertical joints. Naturally, all holes for switches and sockets should be drilled in advance, even before the installation of drywall.
8. Installation of GKL sheets should be started with the upper corner of the Ostvoy, entering self-tapping screws into it after 20-25 centimeters. It is advisable to scave the screws inside the sheet by 0, 5-1 million. Then these places can be smeared with putty.
9. After the installation of drywall is completed, proceed to processing the seams. First of all, they should be cleaned of any garbage, primed with deep soil (typhoid-group) and close all the seams with putty. 10. After all this, align with putty all sheets and prepare the wall for further decoration.
Well, here, perhaps, that’s it! The installation is completed. Good luck in the hard, endless repairs!